Wednesday, March 02, 2011

Square of Pythagoras - Some Extentions

Yet again we used the square of Pythagoras, although this time we worked together at arranging it, Ella dividing up the pieces between us, although she always kept the squares.  "After all, I'm the student!" she explained.

Ella and I have made the square of Pythagoras.  Then I directed her to build the tower with the pink cubes.

Without any prompting on my part she took the smallest square and put it on the smallest cube of her tower and said, "Look Mummy!  They go together!"

We then "related" the pink cubes with the square of Pythagoras.  I asked how she knew where each would go and she explained that each side of a cube was a square and that therefore the pink cubes would go on the actual squares in the square of Pythagoras.


Ella then proceeded to relate the two materials in the same way as she had done with the red square and the smallest pink cube.

Then she did it horizontally.


After we had put away the pink tower and reorganized our square of Pythagoras I got out the bead square for her to relate them together.  She told me that it was pretty easy since they all matched in colour.

Here she is almost done.  I then extended the lesson a little by giving her an early glimpse into multiplication; though we are not yet "naming" it as such as I would like her to absorb the ideas sensorially first.  I would touch each bead square, while it was superimposed on the square of Pythagoras and say, "One one is one.  Two twos are four.  Three threes are nine," and so on.  After each statement I would pause for her to touch the square and repeat what I just said.  I expect this activity will continue in a variety of ways until we are actually doing "real" multiplication.

Our "fancy" storage container for the square of Pythagoras - a plain wood tray from the dollar store.

Labels: , , , , , , , ,

Tuesday, March 01, 2011

Square of Pythagoras - First Presentation


Thanks to all who inquired.  No, I'm not dead!  It's been almost a year and a half since my last post, and while my life has been moving quickly onward I've been facing it mostly with glazed eyes and an air of confusion.  Such is life with twin boys.

My sons are now 2 and are healthy, mischievous little fellows.  I've begun to do some early Montessori work with them, which you will hear about in an upcoming post.

Ella is now "officially" grade 1, in that she is 6 and that is the typical grade 1 age.  And there ends all that is "typical" about her.

Evidently she's doing some things on a grade 4 level, and she was teaching our 17 year old babysitter about geography.  Her reading is about average, or perhaps a bit above average for her age, and her handwriting in abominable!  Though much of what she writes looks like the hen-scratchings of a preschooler, what she writes is very well done.  I guess we just didn't do enough of the sandpaper letters or the metal insets.

I have a vast backlog of photos and lessons to share and I hope to do so over time.  For today, here was our afternoon lesson: the first presentation of the square of Pythagoras (also called the deconomial square).


The square of Pythagoras is basically the multiplication times table in visual form.  The smallest square is 1x1 cm and is red in colour, which coordinates with the colour of the bead bars.

The next three shapes are green, like the "2" beads and are 2x1 cm, 2x1 cm, and 2x2 cm square.

The next five shapes are pink, representing "3" and are (2) 3x1 cm, (2) 3x2 cm, and a 3x3 cm square.

In the above photograph, Ella is laying out the 4s.


I find that she really enjoys making the square of Pythagoras as she thinks that the pattern is beautiful.  I think so too.


The completed square (as done by Ella).  As you can see it goes from 1x1 cm to 10x10 cm.  It is meant to coordinate with the pink cubes, the brown/broad stair/rectangular prisms, and ultimately can be used as a guide to laying out the bead bars in the deconomial.  Hopefully I will be showing these extensions in the near future.

As for the Square of Pythagoras material itself.  It is really hard to find to purchase. Ideally it is supposed to be made out of wood, but I found it much easier to make it out of foam sheets using a large paper-cutter.  (An office-sized paper cutter can be invaluable when making materials.)  I've also seen beautiful square of Pythagoras lay-outs made of felt or other fabrics, plastic duo-tang covers (though I don't know how easy or difficult it would be to find the colours you want), and painted cardboard or bristol board (though they can tend to warp).

Initially I planned on making it using inches as a base, rather than centimetres.  Bad idea!  It was HUGE and very unweieldy.  I'm very glad I downsized, though what I'm going to do with all that extra foam is beyond me!

The first presentation of the square of Pythagoras is not meant to teach the multiplication table, but like the binomial and trinomial cubes it is a sensorial introduction to a more complicated mathematical concept.  Right now we call all the green rectangles and square the "twos,"  all the pink the "threes" and all the yellow the "fours."  It will be some time before we begin to name individual rectangles 2x1 or 4x3.

To present it I simply named the material, "This is the square of Pythagoras." and I began making the square, beginning with the red, then the green, then pink, and so on.  It didn't take long before Ella got the idea and just took over.

She was rather frustrated by the fact that her square of Pythagoras wasn't as "perfect" as mine, but with a bit of reassurance that it took practice she became satisfied with her results.  I'm looking forward to her reaction to the extentions.

Labels: , , , , , , , , , ,

Saturday, October 25, 2008

Montessori Research & Development Teacher's Manuals

If you've never browsed the materials at Montessori Research & Development, press pause on reading this article and go there to see their products. They offer high-quality teachers' manuals, curriculum materials, and books pertaining to Montessori teaching method.


Thus far, I've discovered that there is one thing that even surpasses the excellence of their products: their customer service. Albeit, I only dealt with one of their representatives, but I was extremely impressed with how accommodating she was, going far away and beyond the call of duty.


The best example of this had to do with shipping to Canada. International buyers beware: contact the company directly via e-mail or phone when placing your order because their on-line shipping calculator is utterly daft. When I tried to place my order through their online check-out, the price of shipping was greater than the cost of my entire shopping cart! It was clear that something just wasn't right, so I e-mailed the company and found out that shipping to Canada had a flat rate of $32.85 per box (that being the least expensive option). Since my order didn't fill the box completely, their representative and I fiddled around with the contents, adding and subtracting manuals until the box was as full as it could get!


In the end I bought the following Early Childhood teachers' manuals:

What actually arrived in the box included the above manuals, plus CONTINENTS, FLAG PARTS, and PICTURE MATCHING- ORCHESTRA INSTRUMENTS. Naturally I was impressed and very pleased.

In addition to my order directly through Montessori Research & Development, I have purchased several of their items used from other Montessori parents. These items were:


Of all the products I have from Montessori Research & Development none of them have been less than excellent quality. The manuals are available either bound or in loose leaf. I opted for the bound when buying them directly, but the Geography Manual came in loose leaf. There are advantages to having the loose leaf: once you've hole-punched it and put it in a binder you can add in regular loose leaf pages between lessons to add your own notes. Having the manuals bound means that there's no chance of pages disappearing into the fourth dimension, which would be entirely too likely in my case! At any rate, I have no problem with writing directly in the manuals, since they are mine and now that baby #2 is on the way, I'll be re-using them rather than selling them.

The lessons themselves are generally short, clear, and rather easy. Naturally the manuals assume full access to Montessori materials, so I try to keep reading a few lessons ahead so I know what will need to be made. Thus far, I am making the most use out of the Mathematics, Language Arts, and Sensorial manuals, though I am branching further into Geography and am planning out materials for Zoology. Until then we're continuing with human anatomy - more on that later.

Initially I had thought the cost of manuals at Montessori Research & Development were too high (at least for my budget), but as I searched for other teachers' manuals I began to realise just how reasonable their prices were. For example, the Mathematics manual was $30.00 American. Even after having placed my order I still thought that particular manual expensive - until I received the parcel! Then, as I hauled out the Mathematics manual, which proved to be much heavier and was indeed much larger than any of the other manuals, I understood the higher cost. In fact, the Mathematics manual will not only be used during the preschool years but the lessons run for children from age 3 to age 8! In my opinion, that's value.

In trying to decide which manuals to order, I found reading the table of contents very helpful. They are available for almost every teachers' manual on the website and can be invaluable when trying to decide which level of Language Arts will be best for your child.

A couple of the wonderful consequences of having concrete teachers' manuals are that I can spend a lot less time online trying to find out what the appropriate next lesson will be after Ella absorbs the current lesson, and that I can carefully pick which materials I will most want to have at hand.

For example, the breadth of use of the Montessori bead material for mathematics in the Mathematics manual made it abundantly clear that having real beads as opposed to images of beads or stick-lengths coloured to represent the bead material would be worth the cost, time, and effort of getting real beads and making all the math materials. Having looked over the lessons I can see that they will get a lot of use and will be used for a lengthy period of time - at least into middle elementary.

Essentially, having the actual manuals makes it much easier to prepare lessons, figure out what is worth making (or buying, as the case may be), streamline your resources, and minimize the hassle of printing up hundreds of lessons from online and then having to sort and order them. The manuals make Montessori homeschooling easier - both for you and for your child. That is really worth it!

Please note that the photographs displayed in this review are copyrighted to Montessori Research & Development and each is linked to it's original source on their website. (At least I hope they are - I tried to link them properly!)

Questions and comments on this post are welcome and further discussion as a result will probably end up happening in the "comments" section. If they are too numerous and/or require more depth of discussion, I'll post a sequel to this blog with more details.

Happy Teaching!

Labels: , , , , , , , , , ,

Thursday, May 08, 2008

DON'T Make Your Own Sensorial Materials - Part 1 - Knobbed Cylinders

To Make or Not to Make - That was the question!
I cannot begin to tell you how many times my father and I talked about, measured, planned, and tried to figure out a way to make the Knobbed Cylinders! We have wracked our brains (or, more precisely, I have wracked my brain), and though initially Dad said (after I told him the price of the knobbed cylinders), "Of course we can make them! You aren't paying XX.XX dollars for four blocks of wood with little round things in them!"

But when faced with reality: meaning of course, after I had measured the sizes of all the cylinders, both width and depth, in imperial because naturally none of his drill bits would be metric, he said, "You need them to be that precise?" *scratches head while wrinkling brow* "Uh, I don't know about that." Eventually he caved an said, "Yes, order them, I can't make them!"

So here they are! (At least, half of them - I've only put out the first two as Ella isn't ready to add the third or fourth yet.) I took them up to Mum and Dad's after they arrived to show him, at which point he informed me, "Yeh, we couldn't have made those. At least, we couldn't have made them anywhere close to accurately, and they wouldn't have looked very good, either!"

Now you can all laud me for my grace and patience as, during the course of all this, I never even tried to strangle him for insisting initially that he could make them, and that I shouldn't waste my money, resulting in me actually ordering and receiving them long after I would have otherwise!

If you happen to live in an area where getting drill bits sized in metric is easily possible, then I would definitely recommend finding a friend/neighbour/acquaintance who has a drill press and make your own. But, if you have difficulties finding dowels in appropriate sizes, you might want to consider buying the knobless cylinders (also known as the coloured cylinders) sanding them with a very fine grit sandpaper, and then painting them brown. Then attach knobs with carpenter's glue. I found nice little knobs at a local hardware store. They weren't made to be knobs, rather they were actually little wooden knob-like hole covers that I found in the craft section. But - whatever works!

Why I Decided to Get Them in the First Place
When first trying to decide which materials I should make, which I should buy, and which I could skip altogether, the knobbed cylinders were the first to be scratched off the list, as I thought them unnecessary and expensive. No doubt about it, they are expensive, but as I did more reading, research, and observation of my own daughter, I changed my mind.

You see, individually she may be able to do them quickly and easily, but as she becomes skilled at performing this exercise, I will allow her to do two simultaneously, then three, then four. These are the extensions for learning to used the Knobbed Cylinders visually.

Then I will introduce the Knobbed Cylinders as a tactile activity. Essentially you start from the beginning, using one block at a time, but this time round, you wear a blindfold. Believe me, it isn't easy! I've done all four together as a visual activity, and that was difficult enough. Sometime soon I'm hoping to try it blindfolded.

By the time you've gone through all these activities, your child will probably be well into elementary school!

Oh, and after that there are things you can do with the Knobbed Cylinders and the Knobless Cylinders. I don't know yet what those things are, but when I find out, you'll find out too!

Dimensions of the Knobbed and Knobless Cylinders and Blocks
As for the size of the cylinders and the cylinder blocks, as you can see, their size is substantial:

The blocks themselves are 45 3/4 cm long and 7 1/2 cm wide. The cylinders are identical in size to the knobless cylinders with the exception of the knobs themselves. Their dimensions are as follows:

Block #1 - Cylinders begin with the largest being 5 cm in diameter and 5cm in height. Each subsequent cylinder decreases both in diameter and in height by 0.5 cm. The smallest cylinder is 1 cm in diameter and 1 cm in height.

Block #2 - Cylinders begin with the largest being 5 cm in diameter and 1 cm in height. Each subsequent cylinder decreases in diameter by 0.5 cm and increases in height by 0.5 cm. The smallest cylinder is 1 cm in diameter and 5 cm in height.

Block #3 - Cylinders begin with the largest being 5 cm in diameter and 5 cm in height. Each subsequent cylinder decreases in diameter by 0.5 cm, but the height of all the cylinders is identical. The smallest cylinder is 1 cm in diameter and 5 cm in height.

Block #4 - Cylinders begin with the largest being 2.5 cm in diameter and 5 cm in height. Each subsequent cylinder decreases in height by 0.5 cm, but the diameter of all the cylinders is identical. The smallest cylinder is 2.5 cm in diameter and 1 cm in height.

How to Present the Knobbed Cylinders/Cylinder Blocks
The initial presentation of the knobbed cylinders is fairly simple. The child is asked to accompany the teacher as she shows her something new. The teacher grasps the cylinder block with both hands on either end and carries it carefully to the desk or table. Then the teacher seats herself and begins to take out each cylinder, using the thumb, index finger, and middle finger of her dominant hand. As she removes the cylinders, she places them on the far side of the block in a random fashion.

When all the cylinders have been removed, the teacher begin to replace the cylinders in order, either beginning from the smallest or the largest. The teacher is not to touch the cylinder itself, but rather holds it by the knob, so that she is visually discriminating the size of the cylinder and the hole.

If the student wishes to try replacing the cylinders, then the teacher should step back and allow her to carry on the activity alone while she observes. If the student resorts to touching the cylinders or the holes, or is noisy when performing the activity, the teacher should make note of it, and during the following class time re-present the material noting aloud, "See how I hold the cylinder by the knob, using my thumb and two fingers? That way it's my eyes that are figuring out where they should go!" or "Listen closely as I put the cylinder in. I can do it very quietly! When you replace the cylinders, see if you can do it quietly too!"

Should the student be overly rough, simply take the block away noting that the materials are very special and if we want to be allowed to use them, we need to use them with care so they don't get hurt.

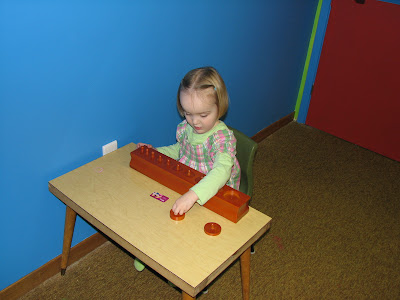
Here Ella is shown using the second cylinder block. The first and second are often offered within a day or two of each other as both sets vary both in diameter and in height, making them the two easiest to master. The next step would either be to present the third block or to teach the child how to use two blocks at once, which is done by placing the blocks in a "V," removing the cylinders as before, mixing the two sets together in the middle of the "V," and then trying to replace them in the correct blocks.

Where to Get Cylinder Blocks
The cylinder blocks were my third order from i-Fit Wooden Toy Supplier (aka Montessori Equipment) which has some of the least expensive Montessori materials I've ever found. Added to that is the fact that I've had excellent service from them. When I placed my order, they had run out of the Economy Cylinder Blocks, so they sent me the Premium Cylinder Blocks instead. Upon arrival, I was very impressed at their beauty. During shipping, however, one of the knobs had been knocked off its cylinder. That was easily fixed with a little carpenter's glue. When I e-mailed the company saying how pleased I was, I happened to mention the slight breakage. Their response was swift: that if it happened again, to let them know immediately and they would send a replacement knobbed cylinder. Needless to say, next time I want to buy Montessori materials rather than make them, I will be ordering from them again.

A Bit on the Funny Side If you look closely at the above picture, not only should you notice that Ella is not holding the cylinder correctly, but that she has it leaning toward another cylinder. The reason is that my daughter is very imaginative. Where others see knobbed cylinders, she sees a variety of interesting people, ranging (in this case) from short and fat to tall and skinny! Here two of the people are talking to one another! Ella's tendency is to anthropomorphise everything! Between that, and her dozens of imaginary friends, our schoolroom can get a bit crowded!

A while back, I promised to do a post on teaching the imaginative child: getting them to control their imagination during school time without stifling it completely. I haven't forgotten that, but as yet I haven't got around to it! As you can see, though, it is something I have to deal with on a frequent basis and much of the time I feel like I'm walking a fine line between crushing her imagination and encouraging her fun and fantastical world! And, as I said before, I will be posting more on that interesting balance later.

Ultimately, she does get the "work" done. And the wonderful part is, for the Montessori student most of their school "work" feels more like school "play," which is as it should be. My final goal is not merely to educate my daughter, but to plant within her a love of learning that will continue throughout her life. After all, if you love learning, then it isn't really "work," is it?

Labels: , , , , , ,

Friday, April 18, 2008

"Make Your Own Sensorial Material" - Part 3 - Sound Cylinders

It's been a while since my last post. I've been very busy trying to keep everyone in the family healthy, as we've been beset by late-winter colds, etc.

I've also been doing a lot of sanding and painting. The pink tower is almost completely finished, and I now have some excellent new materials and manuals that I will be writing about at length in some future post.

But, for tonight, I'm just going to show you my latest finished product - the sound cylinders.

I found an excellent explanation of the sound cylinders and how they work at Educational Video Publishing in their article "An Introduction to Montessori Philosophy and Materials" which, if you go to their link to see the full transcript, is definitely a good read. It reads as follows:
"Building auditory skills is an integral part of the Montessori curriculum. The sound cylinders come in two sets of six hollow cylinders that are color coded blue and red. The child chooses a blue cylinder and tries to match the sound it makes with one of the red cylinders. The materials inside the cylinders are chosen to make louder or softer noises when shaken. By using the sound cylinders, children learn to distinguish subtle changes in volume. "

But, buying them is a ridiculous expense, so I made them.


This is how they turned out. It was one of the simpler items to make. Which was good - I needed something simple for a change! For materials I used:

  1. 14 film canisters - Kodak, to be precise, because you cannot see through them
  2. a pretty cardboard box from the Dollarama
  3. latex primer
  4. high-grit sandpaper
  5. acrylic paint
  6. acrylic varnish/sealant
  7. glue gun
  8. a variety of random items


To put them together, I lightly sanded the covers of the film canisters, to "rough them up" in the hopes that the paint would stay on the plastic all the better. Then I primed them with the latex primer, for the same reason. It took multiple coats of the acrylic paint (3, if I remember correctly) for them to look "good." I sealed that finally with the acrylic varnish, which make the claim that it will not yellow over time. Then came the fun part: stuffing them! I just wandered around the house, trying to find stuff that would make a variety of sounds. I used:

  1. rice
  2. pasta
  3. tiny crushed and rolled-up bits of paper
  4. toothpicks cut in two
  5. some spice - whatever we had a lot of... might have been thyme? maybe sage?
  6. pennies
  7. glass stones

Once they were stuffed, and tested to make sure they were both similar enough in sound, but not too similar, I glued the covers on. And to finish, as you can see in the above photo, I made a control-of-error on the bottom by putting a different colour of paint dot on the bottom of each matching set.

And I know, I know... the question everyone wants answered is... Why seven sets? Why not the "six" as prescribed in the Montessori method? Here's why:

Silly? Yes, I know it is! But the box I bought could hold only seven sets, with one blank spot (which I stuffed with a piece of material so they don't all fall over). Truth be told, Ella has loved using them, but her ear must be pretty good, because she doesn't seem as challenged as I'd hoped she would be. So I might just have to get a bigger box and make some more!

Labels: , ,

Tuesday, March 04, 2008

New Montessori Activities

I'm constantly adding and adapting the activities Ella does for school. Here's some of the newer stuff...

This is a practical-life activity. Essentially, she's learning to use tongs to transfer an item (in this case rocks!) from place to place. She soon figured out that she could get more if she sort of "scooped" up as many as she could before closing the tongs together.


This is a colour-sorting activity, which could fall in the category of "sensorial" or "finger dexterity."

For a long time Ella's favourite colour was blue (it's now green), and she still always begins with blue if green isn't an option.


I'm not 100% sure yet, but I suspect that my greatest challenge is going to be making mathematics fun and interesting. We've used the small number rods (pictures previously, but not in use), but in order for Ella to do it, I need to be completely with her, helping, showing, and creating games in order to keep her even semi-interested. Since until now that has been our only math-oriented activity, I've added my version of the spindle box. It was very easy to make. I got a few long, thin dowels and had Dad cut them into 5-inch lengths (45 spindles are needed for the activity), and sanded them. Then, using a "snap together" desk organiser that I got at the Dollarama ($1 for three parts, I needed ten, so I bought 4 - anyone need 2???), which didn't snap together very well! So I glued them together in two sets of five (easier to move, and takes less space), and using a thick permanent marker, I made the numbers 0 through 9 at the ends of each section. She's either not "up" to doing it on her own, or is not able to maintain interest in it on her own yet, though. So we're doing it as a game and we take turns putting the correct number of spindles in each section. I try to be sure that I alternate between doing the even and odd numbers.

She does really well until about 5 or 6, and then (quite honestly) I think she gets bored and doesn't bother really trying to do it correctly anymore. Math just doesn't have the fascination for her that other subjects seem to. I can't really blame her; neither of her parents were fond of math either!

WARNING - NUDITY AHEAD!!!

That is to say, our anatomy lesson - which (strangely enough, lol...) is anatomically correct! (To see the "nudity" you may have to look closely).

I got this anatomy layer-puzzle at one of my favourite toy stores, Hot Toads! (you can peek at my links, if you want to see other great stuff). I never have enough money when I go there. They are primarily an online store, but they do have a small store in Oromocto, New Brunswick, and the owner really knows his stuff. It's put out by Beleduc-Hape Toys.


This was an excellent activity. The bottom layer is the skeleton, then organs and systems, musculature, skin/nude, then dressed. As she did the puzzle, we talked about what the different parts were called and what they were for in a fairly informal manner. She did catch a lot, because I over heard her explaining to her grandmother that the skeleton was bones inside you and those are you "hard parts"!


Perhaps our favourite subject of all - geography! We're doing world continents. Ella adores maps and globes, and I've always like geography and cultural studies. I've made some "Antarctica" cards that we play with, and we're still planning an "Antarctic Expedition," which will take place in a snowy, barren location (maybe our back yard!). I had been hoping to do it tomorrow, but the weather might be against us. Freezing rain - yep, okay, they've got THAT in Antarctica, but by noon it's supposed to be just plain rain, and that will be wet and miserable. I need a cold day for it, not a wet one!


Ella had a surprise visitor - Nanie! Mum, being off from school (yea March Break!), came down to see Ella at her school, and to play. Every time Ella takes a piece out of the puzzle and lays it on its corresponding "shadow" above the written name of the continent, she'll say, "This is _____" (fill in the blank with whatever continent it is). She doesn't get them all right yet, but when she's stumped, she looks up at me and says, "I can't bemember this one!" and I'll tell her. She'll then repeat the name and continue. When re-assembling the puzzle, she also says each name.


She was so proud of herself - she got them all out, on the right shadows, and said all their names correctly when showing Nanie! Nanie (being a typical grandmother) was pretty proud too!

Labels: , , , , , , , , , , , , , ,