Friday, March 18, 2011

Zoology & Taxonomy

Ah, science.  Of all subjects it was my weakest in high school: chemistry specifically.  I did alright in biology, mostly because my best friend and I were in the same class and studies together.  If you listened closely during tests and exams you might have heard us humming softly.  We found that the best way to remember the facts was to make up silly songs.  If only I had begun learning science the Montessori way!  Here is a sample lesson, one that can be repeated indefinitely without growing tedious.

Above you can see the (almost) completed lesson in zoology/taxonomy.    I use it as a launching board to talk about all different kinds of plants and animals, but mostly animals.  We begin with the most basic of categories: living and non-living.  Ella sets out two pieces of paper, one labeled "Living" and one labeled "Non-Living."


I've made up many cards (just using Microsoft Word, eight cards to an 8 1/2 x 11 page), the vast majority of them animals, for Ella to sort.  I've mixed them all up and divided them into small groups so she can grab a pile and sort through those that day.


Choosing items for non-living was very interesting.  Most things I chose were no-brainers, i.e. they are obviously non-living, but there were a few that were more challenging.  Fire is an excellent one as it has many characteristics of living things (can grow, can move, needs air, needs "food", leaves waste, etc.) and there are a few others that can catch one unawares.  Above you can see that included in this pile are lightening, stalactites, rocks, and a compact disc.  There was no doubt that the rocks and compact disc were non-living, but lightening has some similarities to living things as do stalactites.  It took quite a while for her to decide where to put the stalactites because in an earlier stack she had coral, which appears to be like a rock, but is actually living.  The sneaky ones are the most fun and they help reinforce the difference between the living and non-living.


I scoured the internet for the pictures I used for each card.  While I tried to focus on variety, keeping in mind that the majority of cards would have to be vertebrates, I did make an effort to put in plenty of animals that are native to our area, such as the ruffed grouse (bottom left), which is a popular game bird in New Brunswick.

After separating living from non-living we take our pile of living and divide them up between "Plants" and "Animals."  Yes, I know that there are more categories of living things than just those two, but as they are the most common and encompass almost every living thing with which a child is familiar we focus on them.  Fungus, protozoa, bacterium, etc. can come later.


 Most of this sorting Ella found very easy, but I tried to keep her on her toes.  The Venus flytrap, being carnivorous, gave her a moment's pause.  And she was convinced for a long time that coral must be a plant, which I grant you, is not an illogical conclusion!


This particular pile of cards only had three samples of plants.  Our discussion of the tree trunk was interesting as the tree itself was dead, and therefore neither living or non-living, but it was covered in moss (which was my target species) and the moss was clearly alive.  Ella decided that rather than having just two initial categories there should be three: living, non-living, and formerly-living/dead.  After all, wood was once a tree, and the radishes can't really be living if they've been pulled up out of the ground, chopped up, and pickled!  Smart girl.


After the plant/animal division, we take the animal cards and divide them between vertebrates and invertebrates.


Categorizing animals this way is a bit more challenging.  Because you can't actually see the backbone or spine in a vertebrate you have to think through how an animal moves, how it lives, and what its surface feels like.  Ella is just beginning to remember consistently to look for segmentation of the animals' bodies, hard exteriors such as shells (an exoskeleton), and over-all "smooshiness" (that the body is completely smooshy or soft, indicating that there are no bones).  


Again, putting in tricky cards gives the opportunity to discuss the "why is it this one and not that one?" question.  Above I included a sea horse.   Ella concluded initially that it was an invertebrate because it appears to have an exoskeleton, even though it is a fish, though like catfish sea horses do not have scales. 


Following the organization of the vertebrates and invertebrates we take the pile of vertebrates and then comes the real sorting fun!


With five categories to chose from there's a lot more room for error.  Each animal has to be evaluated in several different ways: what kind of "skin"  it has and/or if it has a skin covering (hair, fur, feathers), whether it gives birth to babies or lays eggs, if it lays eggs whether it lays them on land or in water, if the offspring look like miniatures of the parents or if they have another form entirely, if it has a mouth or a beak/bill, how it breathes, where it lives, if it is warm or cold blooded, and how it feeds its babies.  There are hosts of conversations to be had as we work through these cards, and I frequently find that Ella and I end up laughing, especially at odd animal behaviour or appearance.


Amphibians.  They have slimy skin, live in or near water, are cold-blooded, lay eggs in water, have babies that look nothing like themselves and whom they completely ignore, and usually can breathe right through their skin.  Their appearances have little variation: frogs and toads look similar as do salamanders and newts.  To give a bit more variety I've tried to include pictures of amphibians at various stages of development.


Mammals.* We are warm-blooded, have fur or hair, live all over,  breathe air with lungs, give birth to babies that look similar to the parents (usually!), and feed our offspring with milk from our own bodies.  Isn't it great to be a mammal?  There are quite a few unusual mammals, like whales, manatees, platypuses, etc.  It can be fun to emphasize the similarities between humans and other mammals, as well as the differences.  Thank God for opposable thumbs!  Plus, as a nursing Mum, it's interesting to discuss how other species nurse.  In the case of whales, Ella would not believe me that they were mammals until I found a video of a beluga whale giving birth and nursing her baby!


Fish.  They live in water, are cold-blooded, and breathe through gills.  Some species give birth to live young, but most lay eggs.  The level of parental involvement is usually low to nonexistent.  Although there are three different classes of fish, for the young child and early elementary student so many details can be confusing, so I lumped all the fish together.  When (or if) I ever have time to set up an aquarium again we will certainly get into closer examination of fish classes.


Birds.  Feathers, beaks, wings, and two legs are the most easily recognizable traits.  They are warm-blooded, breathe air with their lungs, lay eggs, and are frequently attentive parents.  One of their families (the penguins) are even able to survive in the harshest climate on earth and one of their species (emperor penguins) stay in that climate during its harshest season in order to go to extraordinary lengths for the purposes of mating, bearing, and raising offspring.  In my opinion, birds are way cool!
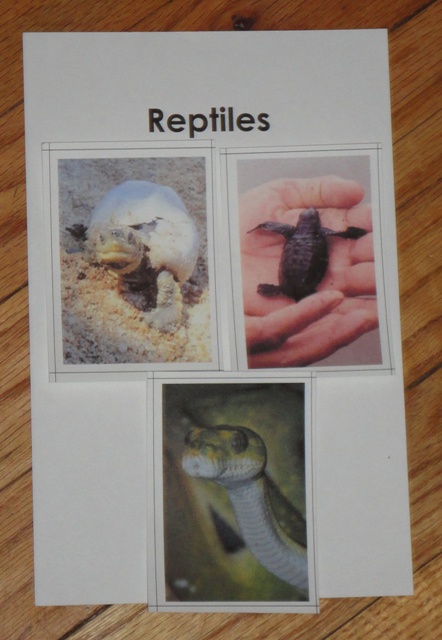

Reptiles.  Some like life where it's hot and dry and others would prefer to stay wet all day long.  But they all have scales, breathe with their lungs, are cold-blooded, lay eggs on land, and their babies look like miniature adults.  They are also very good for frightening grandmothers and mothers when brought in from outside with a cheerful, "Look what I found, Mum!"  (Please note: this refers to something my brother did to my mother and grandmother, not something my children did to me.  I would not be so chicken-hearted... I hope!)


After all the sorting has been done, we clip each section together with other cards of the same category, to play with and discuss later.


Eli added his own artistic touch to the non-living card!


And, as is so often the case with homeschooling Montessori Mums, how to store materials effeciently is of great concern, so here's what I did.  I found this tray and this box at the local Dollarama store.


The tray perfectly fits half of an 8 1/2 x 11 piece of paper (or cardstock), which is what I used for the category titles, and the small crate is perfect as a card holder!


*Please note:  While all the photographs taken above were mine, the pictures in the photographs are not.  They were all found online through Google search.  The human family in the mammals is unknown to me, but it was the best photo I could find of nude humans that was neither graphic (in the negative sense) nor of poor quality.  Since all the other animals were au naturel, I figured it was only fair that the humans were as well.  For the record, I think it is a beautiful and tasteful photo... though I don't think I'd be comfortable with my family posing in such a manner, or at least displaying it!

Labels: , , , , , , , , , ,

Tuesday, March 01, 2011

Square of Pythagoras - First Presentation


Thanks to all who inquired.  No, I'm not dead!  It's been almost a year and a half since my last post, and while my life has been moving quickly onward I've been facing it mostly with glazed eyes and an air of confusion.  Such is life with twin boys.

My sons are now 2 and are healthy, mischievous little fellows.  I've begun to do some early Montessori work with them, which you will hear about in an upcoming post.

Ella is now "officially" grade 1, in that she is 6 and that is the typical grade 1 age.  And there ends all that is "typical" about her.

Evidently she's doing some things on a grade 4 level, and she was teaching our 17 year old babysitter about geography.  Her reading is about average, or perhaps a bit above average for her age, and her handwriting in abominable!  Though much of what she writes looks like the hen-scratchings of a preschooler, what she writes is very well done.  I guess we just didn't do enough of the sandpaper letters or the metal insets.

I have a vast backlog of photos and lessons to share and I hope to do so over time.  For today, here was our afternoon lesson: the first presentation of the square of Pythagoras (also called the deconomial square).


The square of Pythagoras is basically the multiplication times table in visual form.  The smallest square is 1x1 cm and is red in colour, which coordinates with the colour of the bead bars.

The next three shapes are green, like the "2" beads and are 2x1 cm, 2x1 cm, and 2x2 cm square.

The next five shapes are pink, representing "3" and are (2) 3x1 cm, (2) 3x2 cm, and a 3x3 cm square.

In the above photograph, Ella is laying out the 4s.


I find that she really enjoys making the square of Pythagoras as she thinks that the pattern is beautiful.  I think so too.


The completed square (as done by Ella).  As you can see it goes from 1x1 cm to 10x10 cm.  It is meant to coordinate with the pink cubes, the brown/broad stair/rectangular prisms, and ultimately can be used as a guide to laying out the bead bars in the deconomial.  Hopefully I will be showing these extensions in the near future.

As for the Square of Pythagoras material itself.  It is really hard to find to purchase. Ideally it is supposed to be made out of wood, but I found it much easier to make it out of foam sheets using a large paper-cutter.  (An office-sized paper cutter can be invaluable when making materials.)  I've also seen beautiful square of Pythagoras lay-outs made of felt or other fabrics, plastic duo-tang covers (though I don't know how easy or difficult it would be to find the colours you want), and painted cardboard or bristol board (though they can tend to warp).

Initially I planned on making it using inches as a base, rather than centimetres.  Bad idea!  It was HUGE and very unweieldy.  I'm very glad I downsized, though what I'm going to do with all that extra foam is beyond me!

The first presentation of the square of Pythagoras is not meant to teach the multiplication table, but like the binomial and trinomial cubes it is a sensorial introduction to a more complicated mathematical concept.  Right now we call all the green rectangles and square the "twos,"  all the pink the "threes" and all the yellow the "fours."  It will be some time before we begin to name individual rectangles 2x1 or 4x3.

To present it I simply named the material, "This is the square of Pythagoras." and I began making the square, beginning with the red, then the green, then pink, and so on.  It didn't take long before Ella got the idea and just took over.

She was rather frustrated by the fact that her square of Pythagoras wasn't as "perfect" as mine, but with a bit of reassurance that it took practice she became satisfied with her results.  I'm looking forward to her reaction to the extentions.

Labels: , , , , , , , , , ,

Wednesday, March 26, 2008

"Make Your Own Sensorial Material" - Part 2

I would like to explain here 1) the reason why I decided to make "authentic" Montessori materials as opposed to going with the "good enough" funny blocks (which I think are an excellent toy, and I will continue to use, by the way) and 2) how I wish I had been able to make the sensorial material.

Why Using the Real Pink Tower and Brown Stair Matters
My initial contact with the Montessori method came through Elizabeth Hainstock's excellent book: Teaching Montessori In The Home: The Pre School Years which is fantastic for beginners, especially those who are looking for that "something more" to do with their preschool child. It does not delve deeply into the Montessori method, but gives a simple overview, and provides plenty of "lesson plans" that a parent can easily do with their child. She even includes instructions on how to make your own Montessori materials, which is very handy. But it is preliminary at best, and there is so much more to the Montessori method.

If you are not planning on homeschooling your child using the Montessori method, and you are not going to be able to send your child to a Montessori school for the elementary years, then this book would be perfect. It allows a parent to use the ideas of Maria Montessori without having to spend hours researching and studying, or thousands of dollars buying materials. But for many, once they get a taste of what Montessori is all about, they can't help but delve deeper, study more, and (like me) see the benefit of the actual Montessori materials.

I initially bought the funny blocks to replace the pink tower, but as I read more, and realised how many important things we'd be skipping by relying solely on Hainstock's work, I branched out, both in my reading and in my lesson plans.

There is a beautiful simplicity to the pink tower, and obviously, if you don't have the correct dimensions, it cannot fit with the brown stair for the sensorial extensions. Once I saw the ideas for the extension activities, I realised that I would have to buy or make the pink tower because there was more to it than I initially thought.

Furthermore, there is a beautiful logic to the metric system, that corresponds to the decimal system, and that becomes more and more clear as a child (or an adult!!) uses the pink tower and broad stair.

The dimensions of the pink tower make it perfect for further use in elementary mathematics and science. The smallest cube in the pink tower is 1 cm3 (1cm x 1cm x 1 cm). Every cube thereafter become one centimetre larger in all three dimensions, so the second one is 2cm x 2cm x 2cm and so on up to 10cm x 10cm x 10cm.

For those who are unfamiliar with the metric system, it becomes remarkably simple to use once you understand that it is entirely based around the most common and important element on earth: water. So, if you had 1cm x 1cm x 1cm of water (1cm cubed, or 1 cm3), it would weigh 1mg (milligram), and its volume would be 1 ml (millilitre). As for the 10 cm3 (the largest cube of the pink tower), if you had those dimensions in water, it would weigh 1 kg (kilogram), and it's volume would be 1 l (litre).

You see the same logic with the centigrade (Celsius) measurements of temperature. 0 C (0 degrees centigrade/Celsius) is the point at which water freezes and 100 C (100 degrees centigrade/Celsius) is the point at which water boils.

When you realise this, it makes virtually a limitless number of uses in mathematics for the pink tower and the brown stair, even up into the later elementary years - and if you're inventive, it has applications for science as well. For example: How many of the ___ pink cubes would it take to make a row 1 kilometre long? Or, when studying chemistry: What would the weight of ___ pink cube be if rather than imagining that it was water, we pretended that it was mercury? Or, which of the broad stairs, if water, would weigh 1 kilogram?

If You Want to Make the Pink Tower and Brown Stair
I've got them made, and although they are adequate, they are not as good as I'd hoped. By the time the painting is all done, though, you wouldn't (probably) be able to tell the difference. But if you're thinking of doing it yourself, make it easy on yourself, and do as I say, not as I do!

1) Get good wood! Hardwood would be preferable, but isn't necessary if you get a decent piece of softwood. Look for cracks, fissures, knots, and rot. Some of these are easier to take care of than others, but the better your wood, the less your work!

2) Think about your wood dimensions! Cutting a log down to a 1cm x 1cm x 1cm piece is ridiculous. Make it easy on yourself and for the two smallest pieces, get square dowels. I used a 1/2 inch dowel and trimmed it with the table saw down to 1 cm for the smallest pink cube and brown stair. For the second smallest I used a 1 inch dowel trimmed down. For the next group of sizes (3-8cm), ideally you should have a good 4x4, but make sure it is not pressure-treated!!! That will save you a lot of gluing. Depending on your saw size, you probably could get away with a 6 foot piece, but you might want to error on the side of caution and get an 8 foot piece instead. And I know what some of you may be thinking: "Why can't we use the 4x4 to make all the pieces up to the 10cm x 10cm sizes?" Here's what I learned, not only does the lumber industry use inches and feet rather than centimetres and metres (even in Canada), but they also lie!!! When you say you want a 2x4, they give you a piece of wood that once was a 2x4, but has since been cut down and smoothed off, so it isn't 2x4 anymore! In theory a 4x4 should be able to make the largest cube and stair, but it's really only a 3.5x3.5. Now, if you are really lucky, you might be able to find a 6x6 that's not pressure treated, but you'd probably be going some (I tried and couldn't fine one), so instead stick with the 4x4 and buy an additional 2x6 that is at least 8 feet long. This wood you will need to cut into thirds and glue, one atop the other, so that you end up making you own 6x6 that's just over 2.5 feet long. Out of this you can make your 9cm x 9cm and 10cm x 10cm cuts.

3) To do the actual cutting, you will need a table saw, a mitre saw, and (if possible) a belt sander. Use the table saw to get the width you want (e.g. 1cm x 1cm) and sand it smooth. After you have done that, then use the mitre saw to cut off the lengths you need (one 20cm length for the brown stair, and then another length that matches the width). When it comes to the 4x4, you might want to cut it into appropriate lengths first (e.g. 35cm would be long enough for the 8cm x 8cm size. You would need 28cm, 20cm + 8cm, plus the width of the saw cuts to make the piece, so you'd have some wiggle room in case of making a mistake). This may be stating the obvious, but if you decide not to pre-cut the 4x4 into easier-to-deal-with lengths, then make sure that you work from the largest (8cm) to the smallest (3cm)! And while you're at it, seriously consider making a few extra cubes of the smallest sizes. 1cm x 1cm x 1cm is very tiny and can get easily lost!

4) Finally, all you will be left with is the fine sanding and the painting!

Labels: , , , , ,